.png?table=block&id=e6ae9d56-f35f-40c2-9b1c-128d395a0b38&cache=v2)
Lately, I decided to migrate my old funky domain raptis.wtf to the professional jimraptis.com one.
My old domain was already ranking on Google with a few decent backlinks and SEO traffic. Then, I need to make the migration seamless in order to avoid disappointing Google bots.
In the article, I’m documenting the process and sharing my experience while highlighting all the tricky points.
For my impatient folks, before the in-depth analysis, here is a quick checklist for a successful domain migration:
- Check your SEO meta tags (title, description, open graph images, canonical links, JSON-LD, sitemap etc.)
- Deploy the website to the new domain and make sure everything works nicely.
- Update the references of your old domain on blog posts, social media bio.
- Set up 301 redirects from the old domain to the new one. Test all pages too.
- Create a new Google Search Console account for your new domain
- Use the Change of Address tool to notify Google about the domain transfern.
Double-check all your SEO metatags
You have to make sure all your SEO metatags work correctly and are the same as your previous website. Mostly the SEO titles, descriptions, open graph images, structured data (aka JSON-LD), sitemap.xml, and robot.txt files.
Pay extra attention to the canonical URL which shows the original post’s location. You want to make sure that it links to the new domain.
Deploy the website to your new domain
The next step in your process is to deploy your website to your new domain. That’s not gonna affect your current domain and you’ll have time to fix any potential production issues and inconsistencies with metatags.
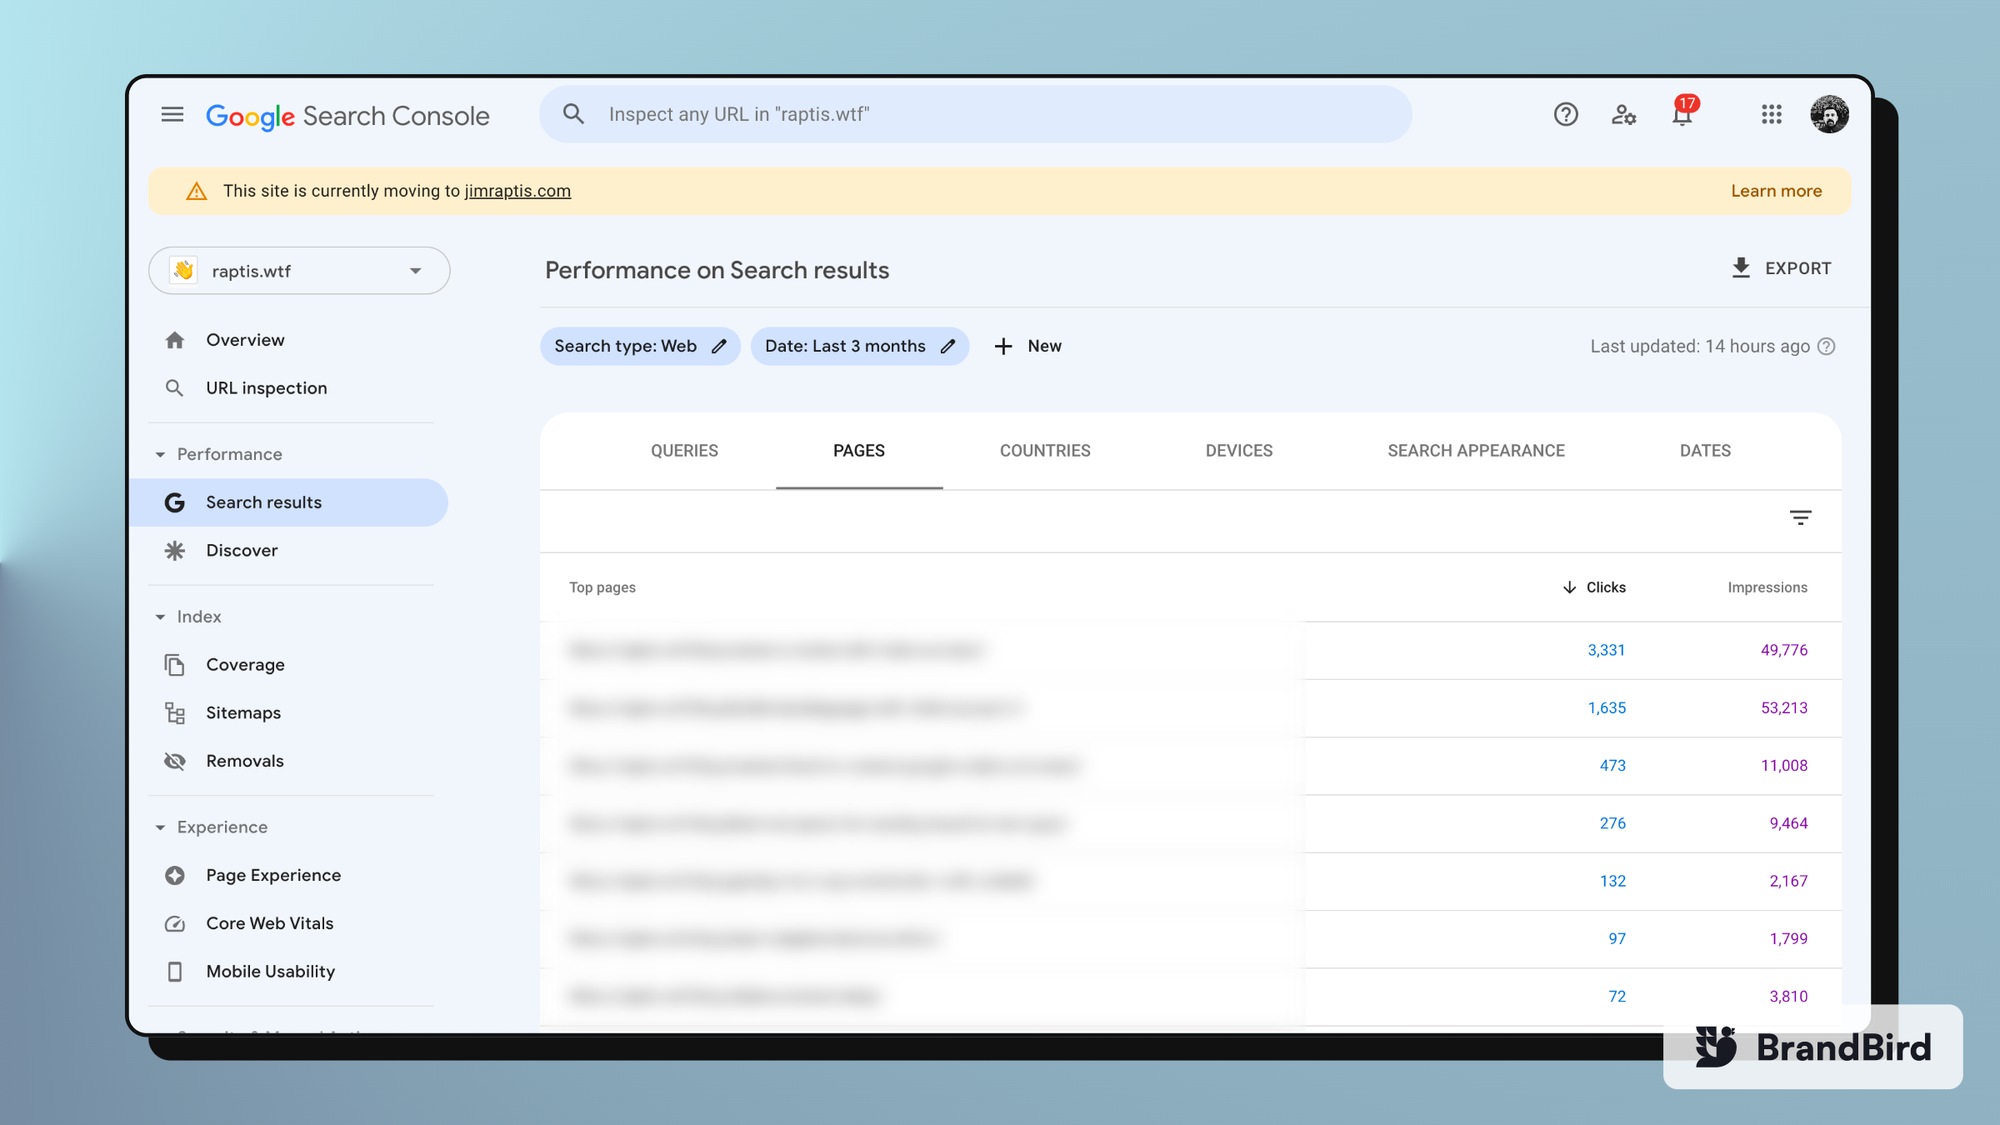
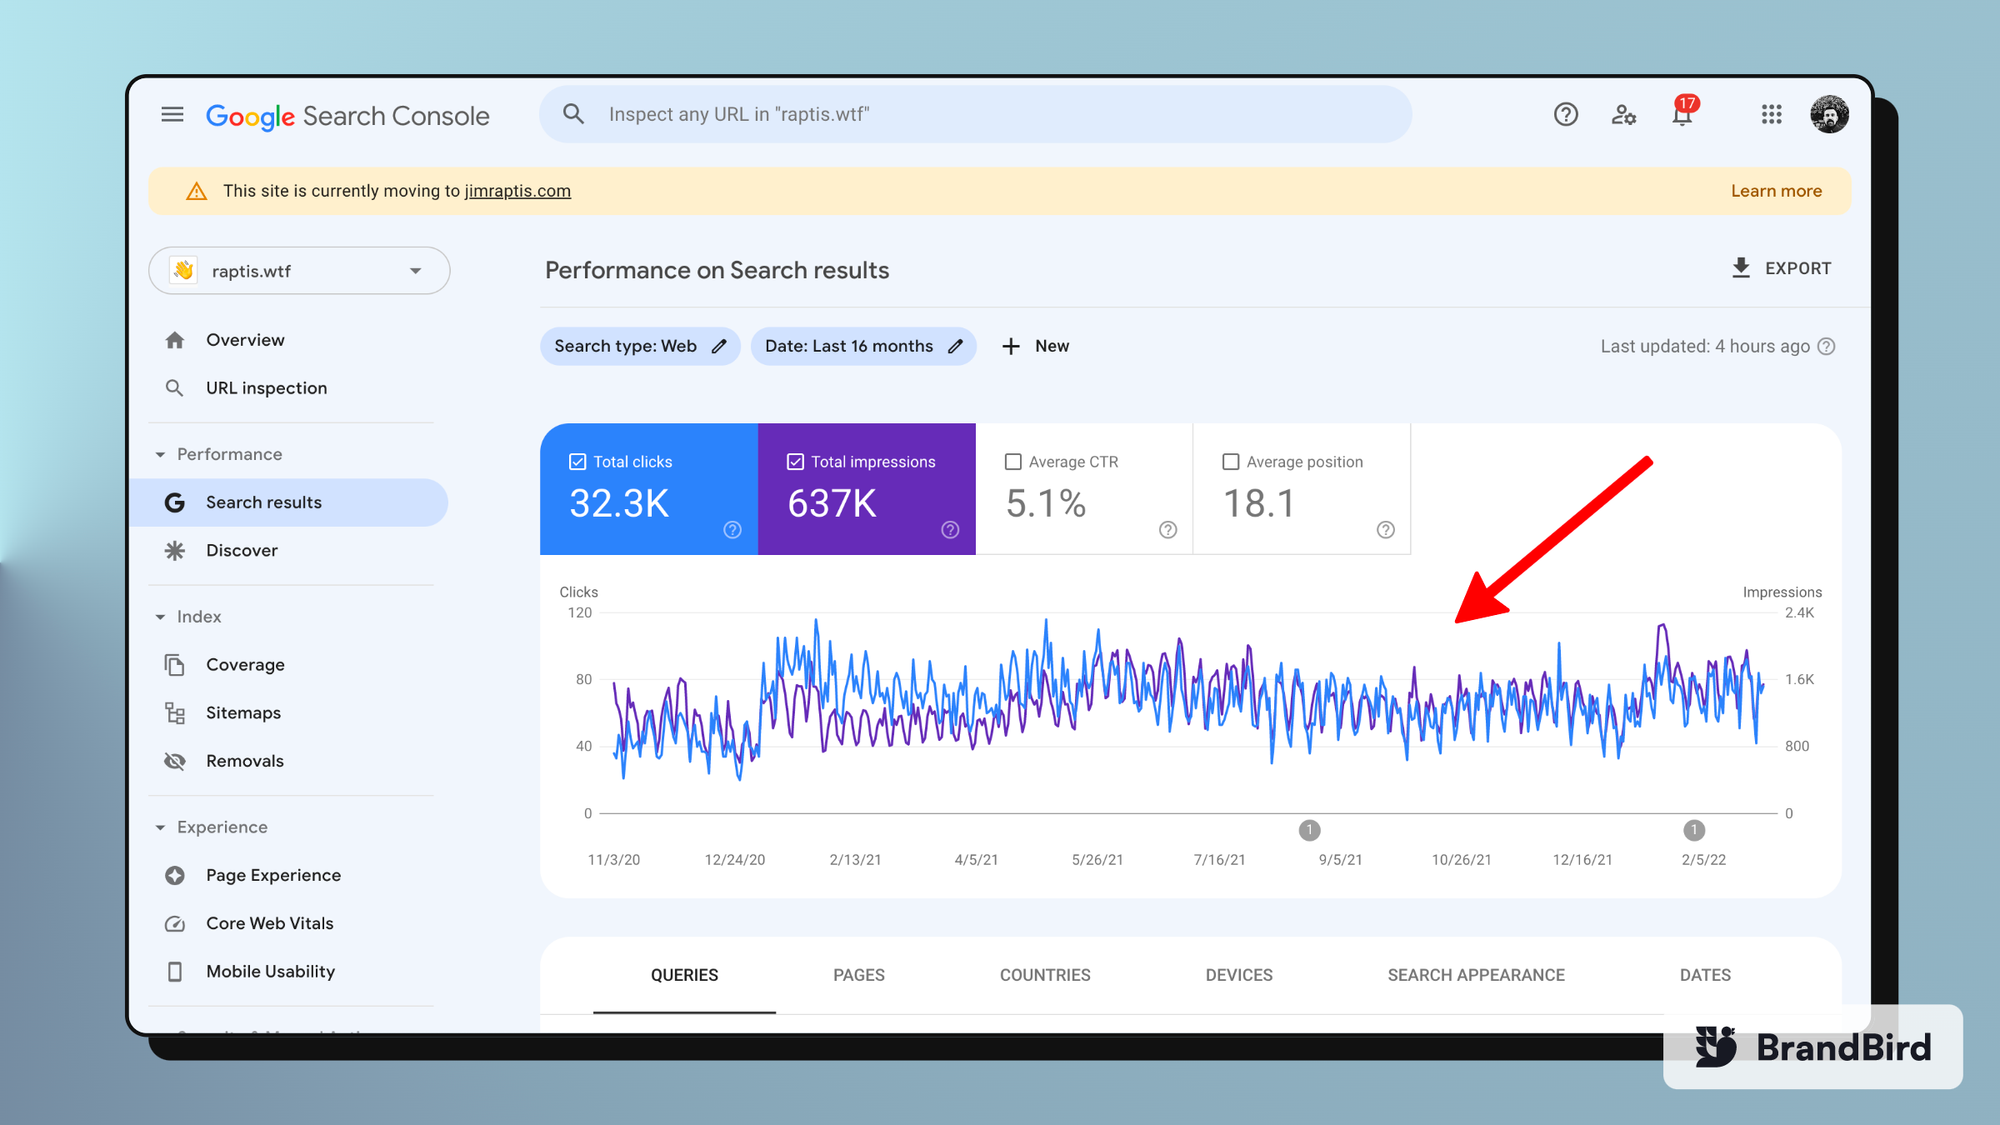
During this step, it’s a good opportunity to visit the performance page of your domain at the Google Search Console, and list your best performing paths. Then, make sure all these paths load correctly on your new domain.
Update your old domain links
By now, you’ve made sure that your new domain works correctly. It’s time to update your old domain references on all your social media profiles and potentially contact the authors of your best backlinks to update it too. It’s not too important since you’ll redirect all the old paths to your new domain, but it might help.
Important Tip: If you cross-post your articles on other blogging platforms, like dev.to, Hashnode, Medium, etc, update their canonical URL to the new domain.
Set up 301 redirects on Vercel
I tried to set up 301 redirects on Namecheap without success because I had to buy and set up an SSL certificate. Doable but it didn’t want to waste time on that.
I already use Vercel for hosting all my Next.js projects so it was a brainer for me. Especially since it’s only two simple steps.
First, you need to add both domains on your Vercel project and set up DNS records on Namecheap.
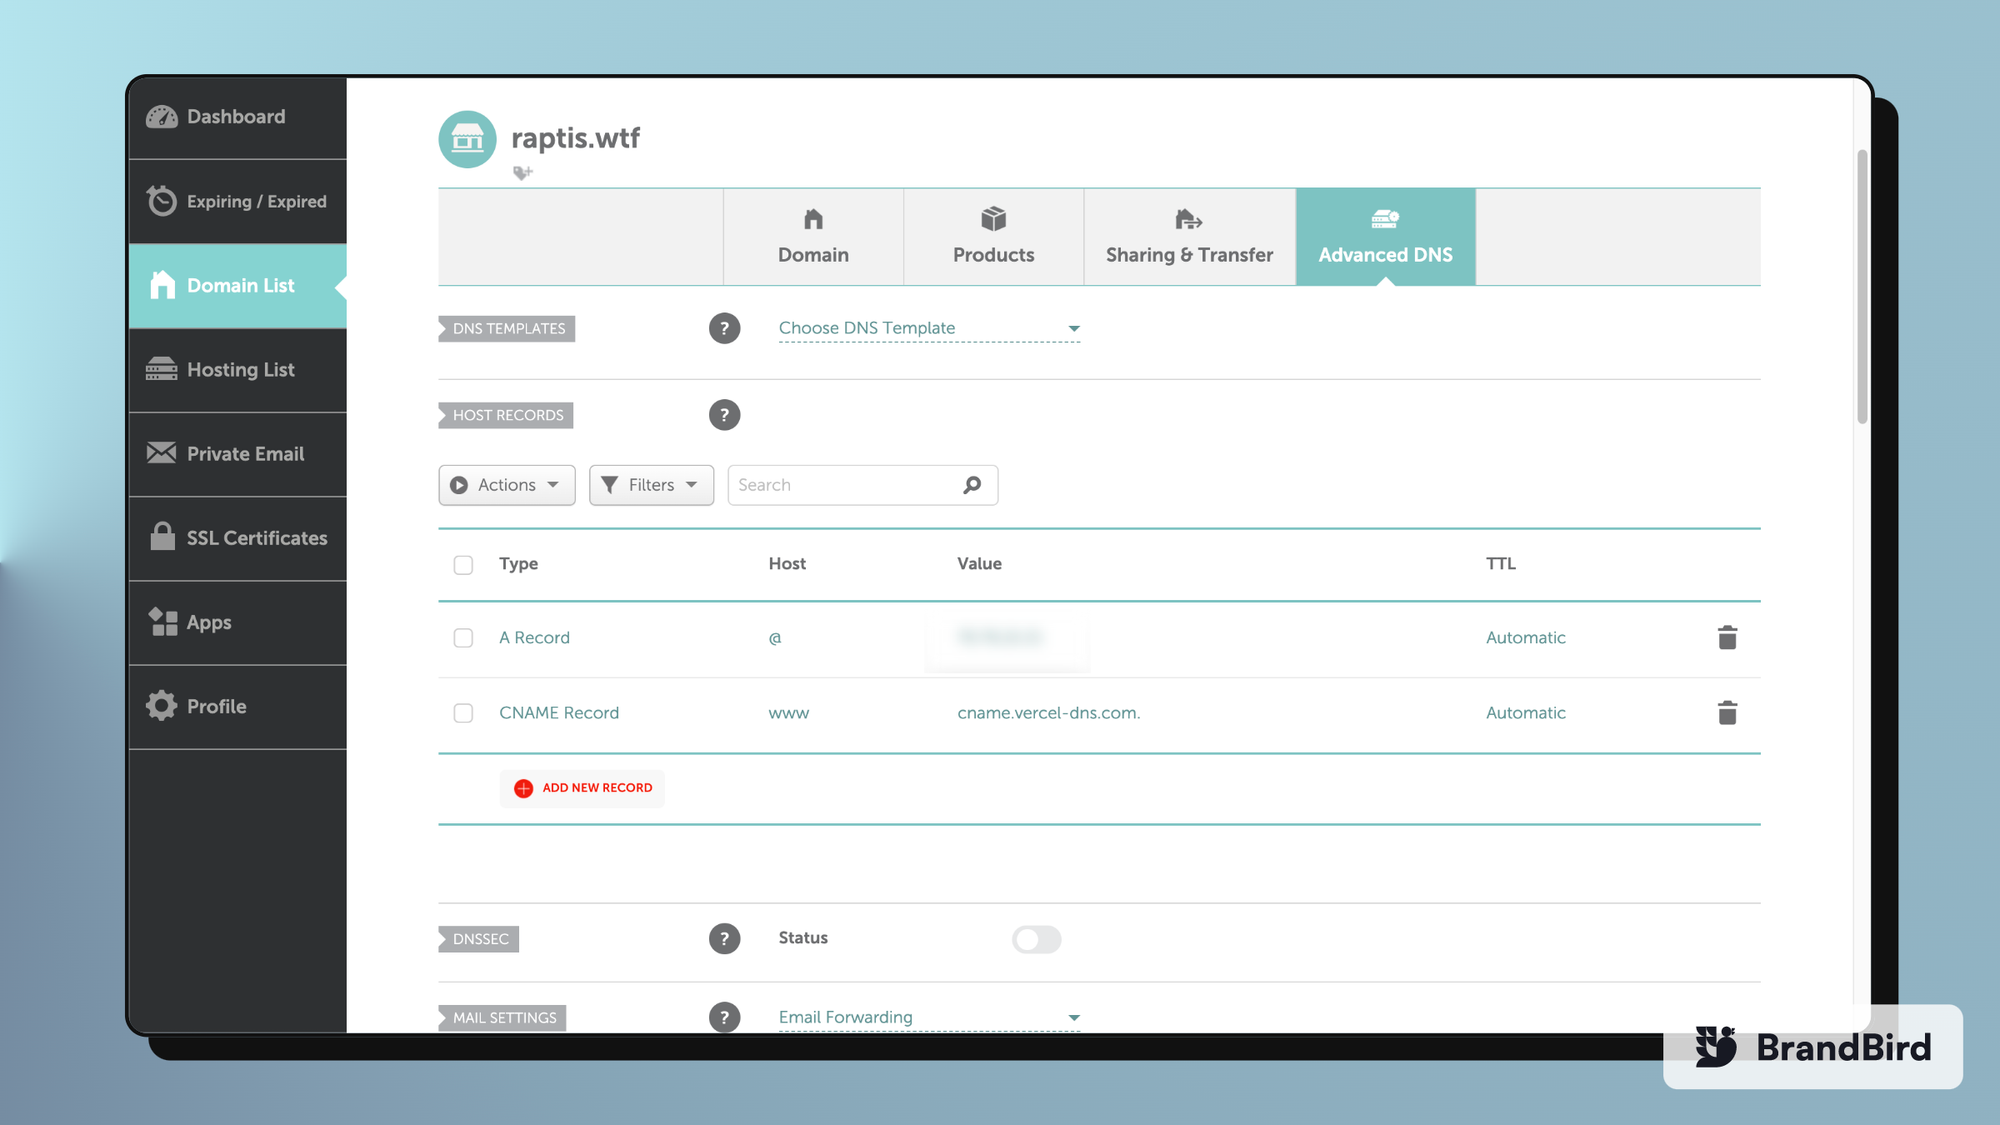
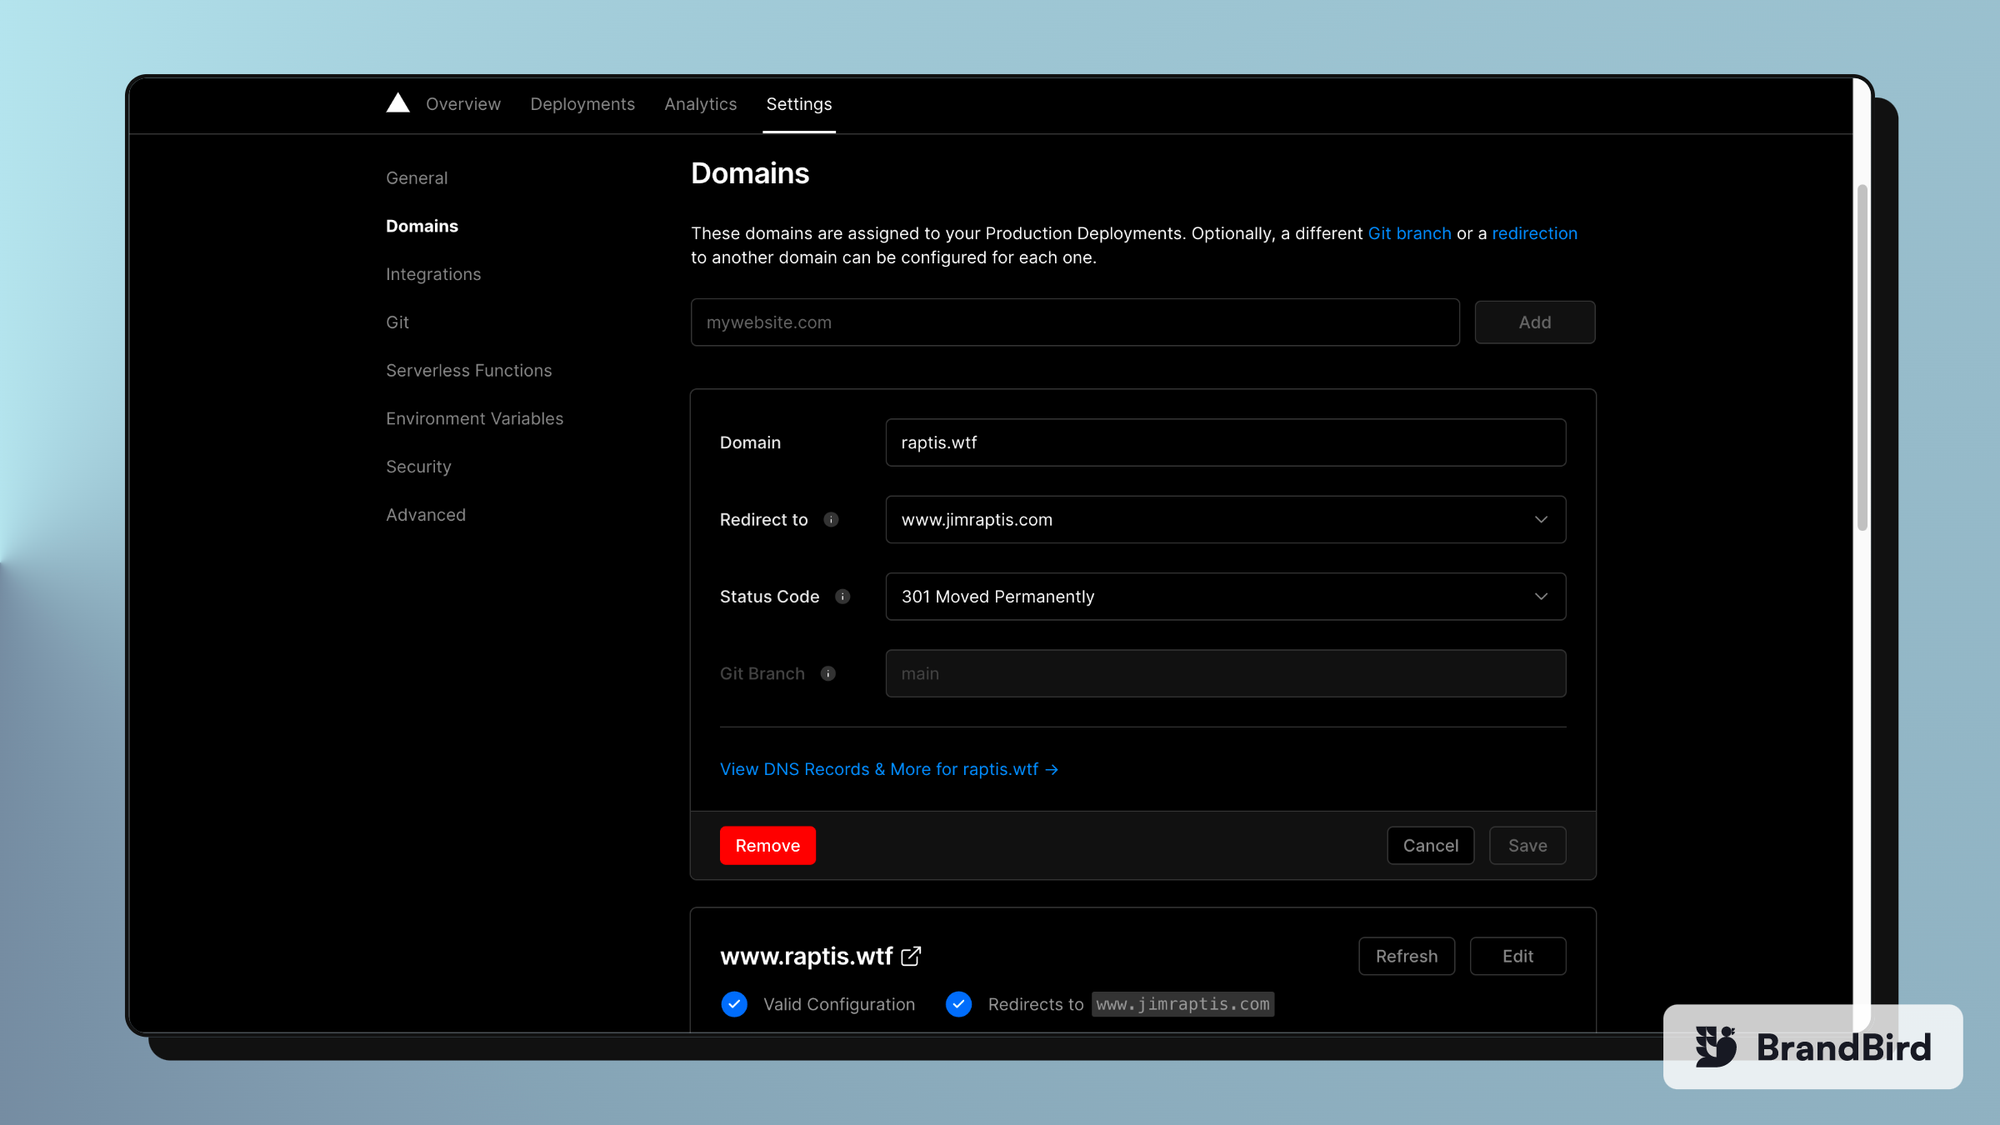
Wait until DNS propagates and you can validate that both domains are added successfully to your Vercel account. Then, you simply click edit on your old domain and pick the new domain (the one with the `www`), and the type of the redirect (301 Move Permanently on our case ).
And you’re ready in 1-2 minutes literally!

Notify Google about the domain change
Most probably, you already use the Google Search Console for your old account, considering that you cared about SEO.
You need to make sure that you create a new property for your new domain as well. Since you’re the owner of both of these properties, you can proceed with the next step and open the Change of Address tool.
Once you navigate the Change of Address page you’ll be prompted to pick a property. You select your old domain, make sure all the 301 redirects work fine, and choose your new domain property on the dropdown under the “Update Google” section.
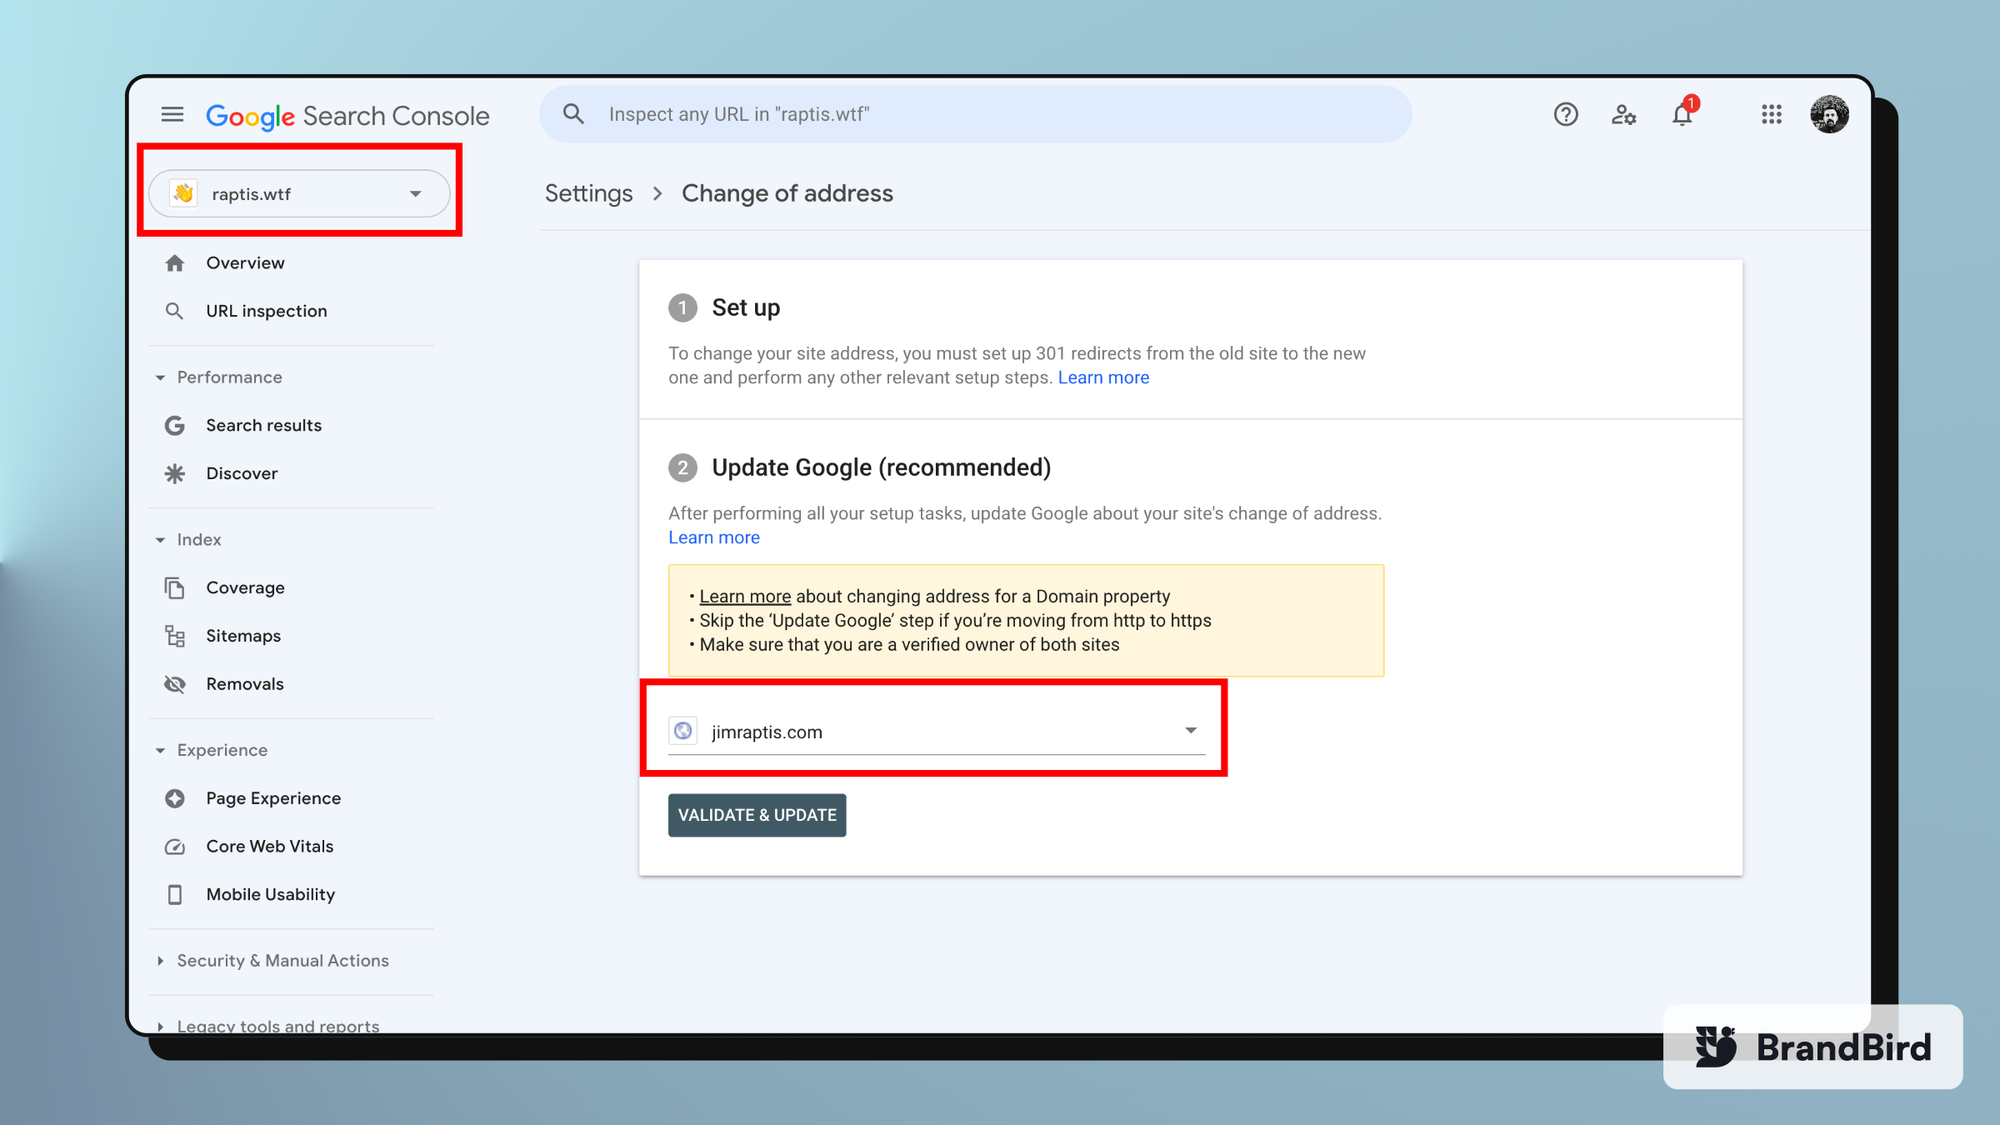
Don’t be afraid to click “Validate & Update” because it’s gonna run a few checks on your most visited pages and let you know if all the redirects work fine.
During this step, I’ve faced an annoying issue (check image below) that stated “301 -redirect from homepage: Couldn’t fetch the page http://raptis.wtf”.
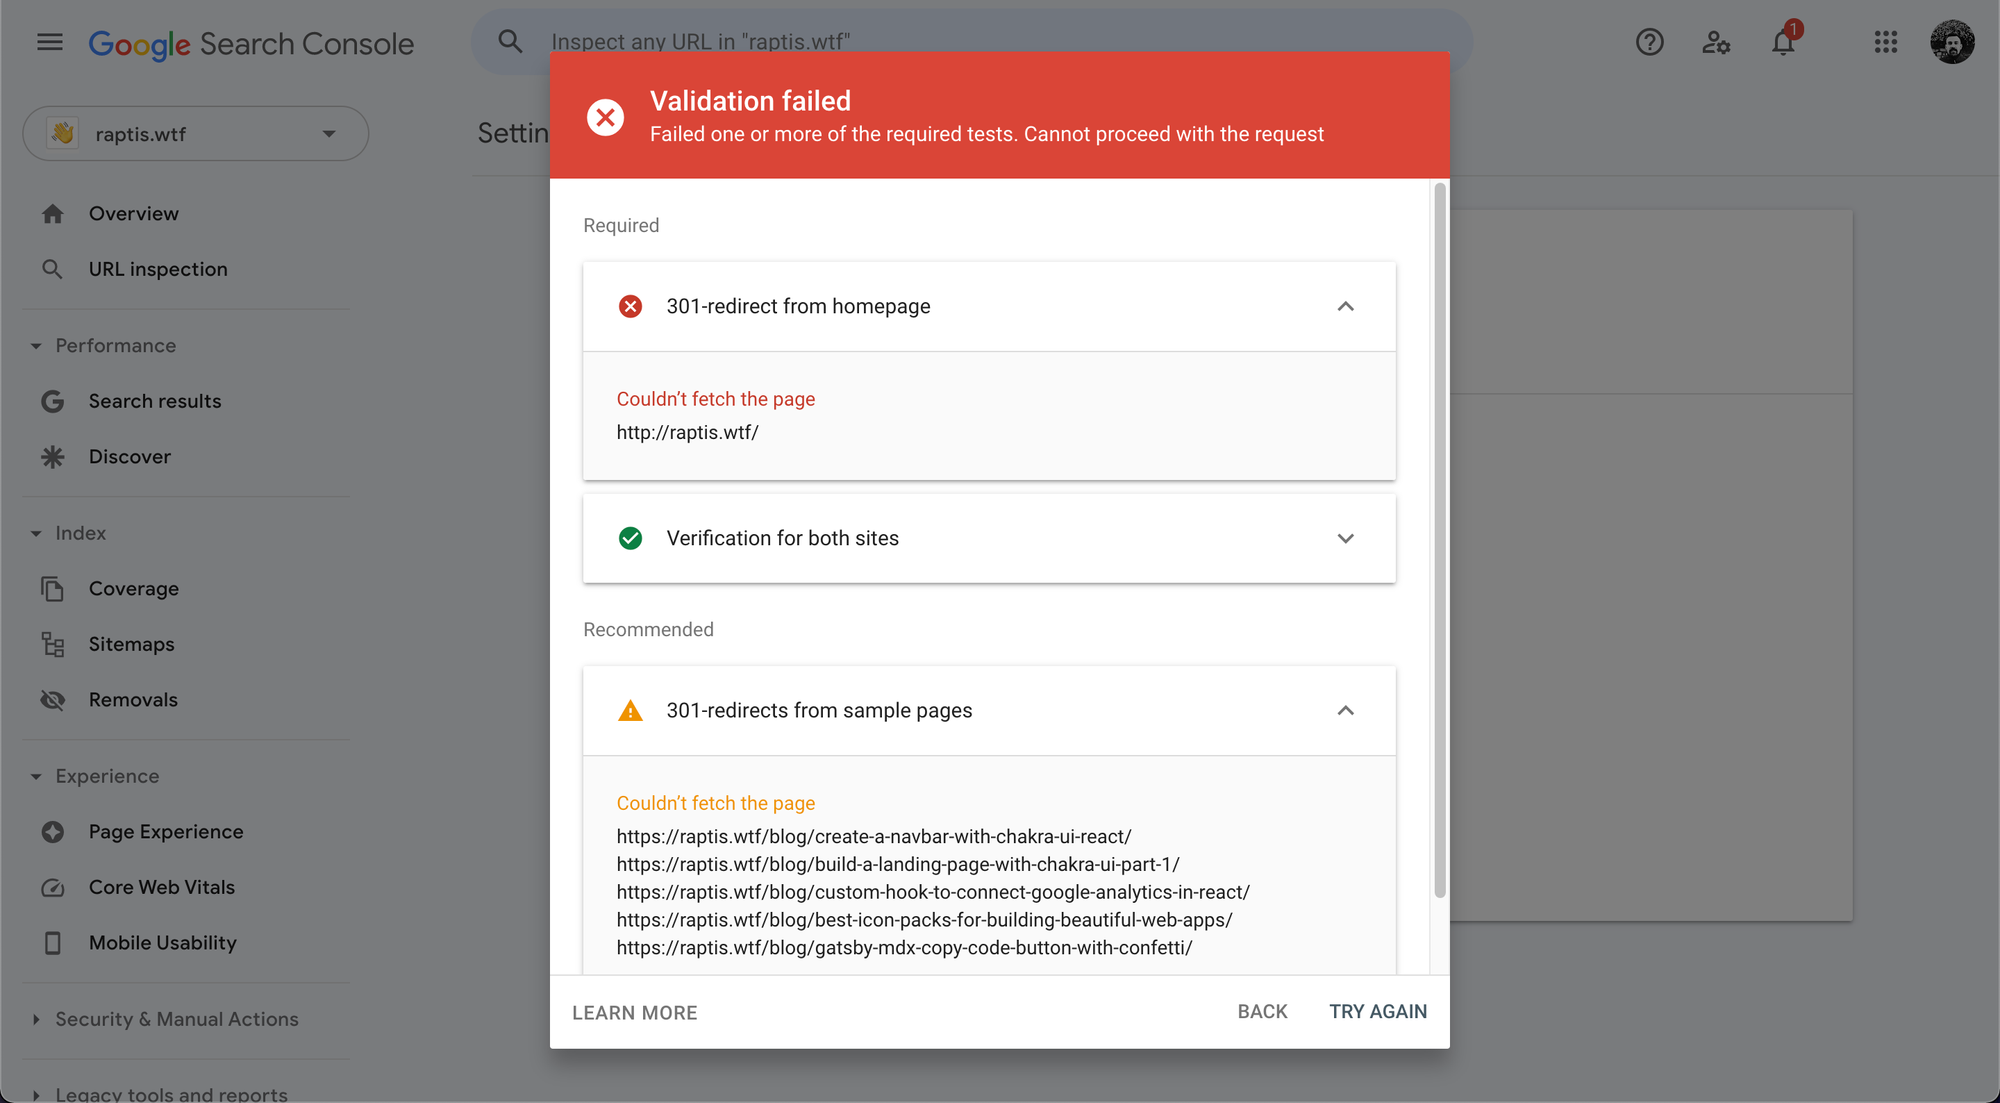
Essentially, the issue is caused because Vercel redirects the http domain to https with 308 status, by default, and then we redirect the https domain to the new domain with 301 status.
Normally it takes a while for Google Search Console to recognize the change and automatically fix the issue.
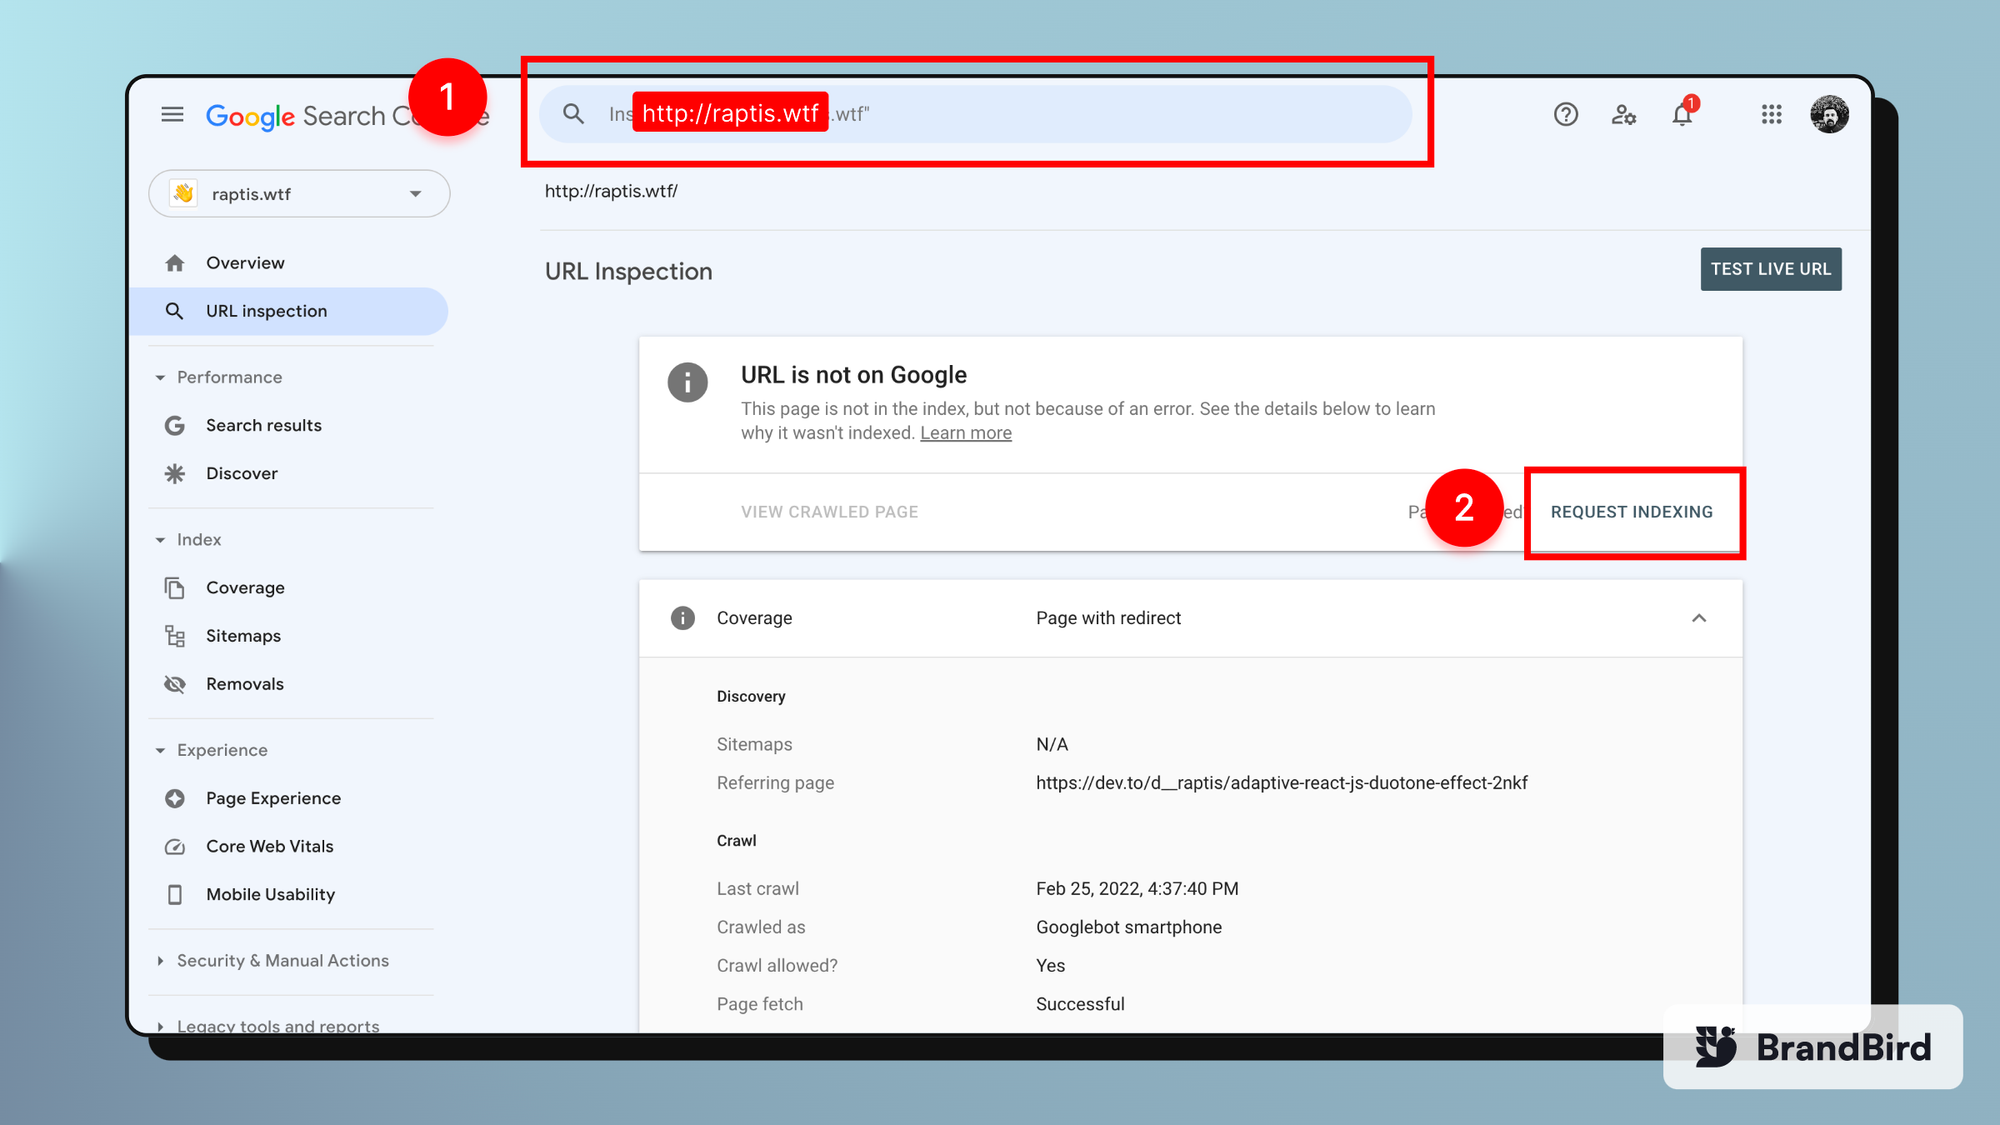
Submitting the failing URL for indexing on Google Search Console might speed up the process.
For me, it works after a few hours and multiple page refreshes. But it took up to 3 days for other people.
Have Google crawl the new domain
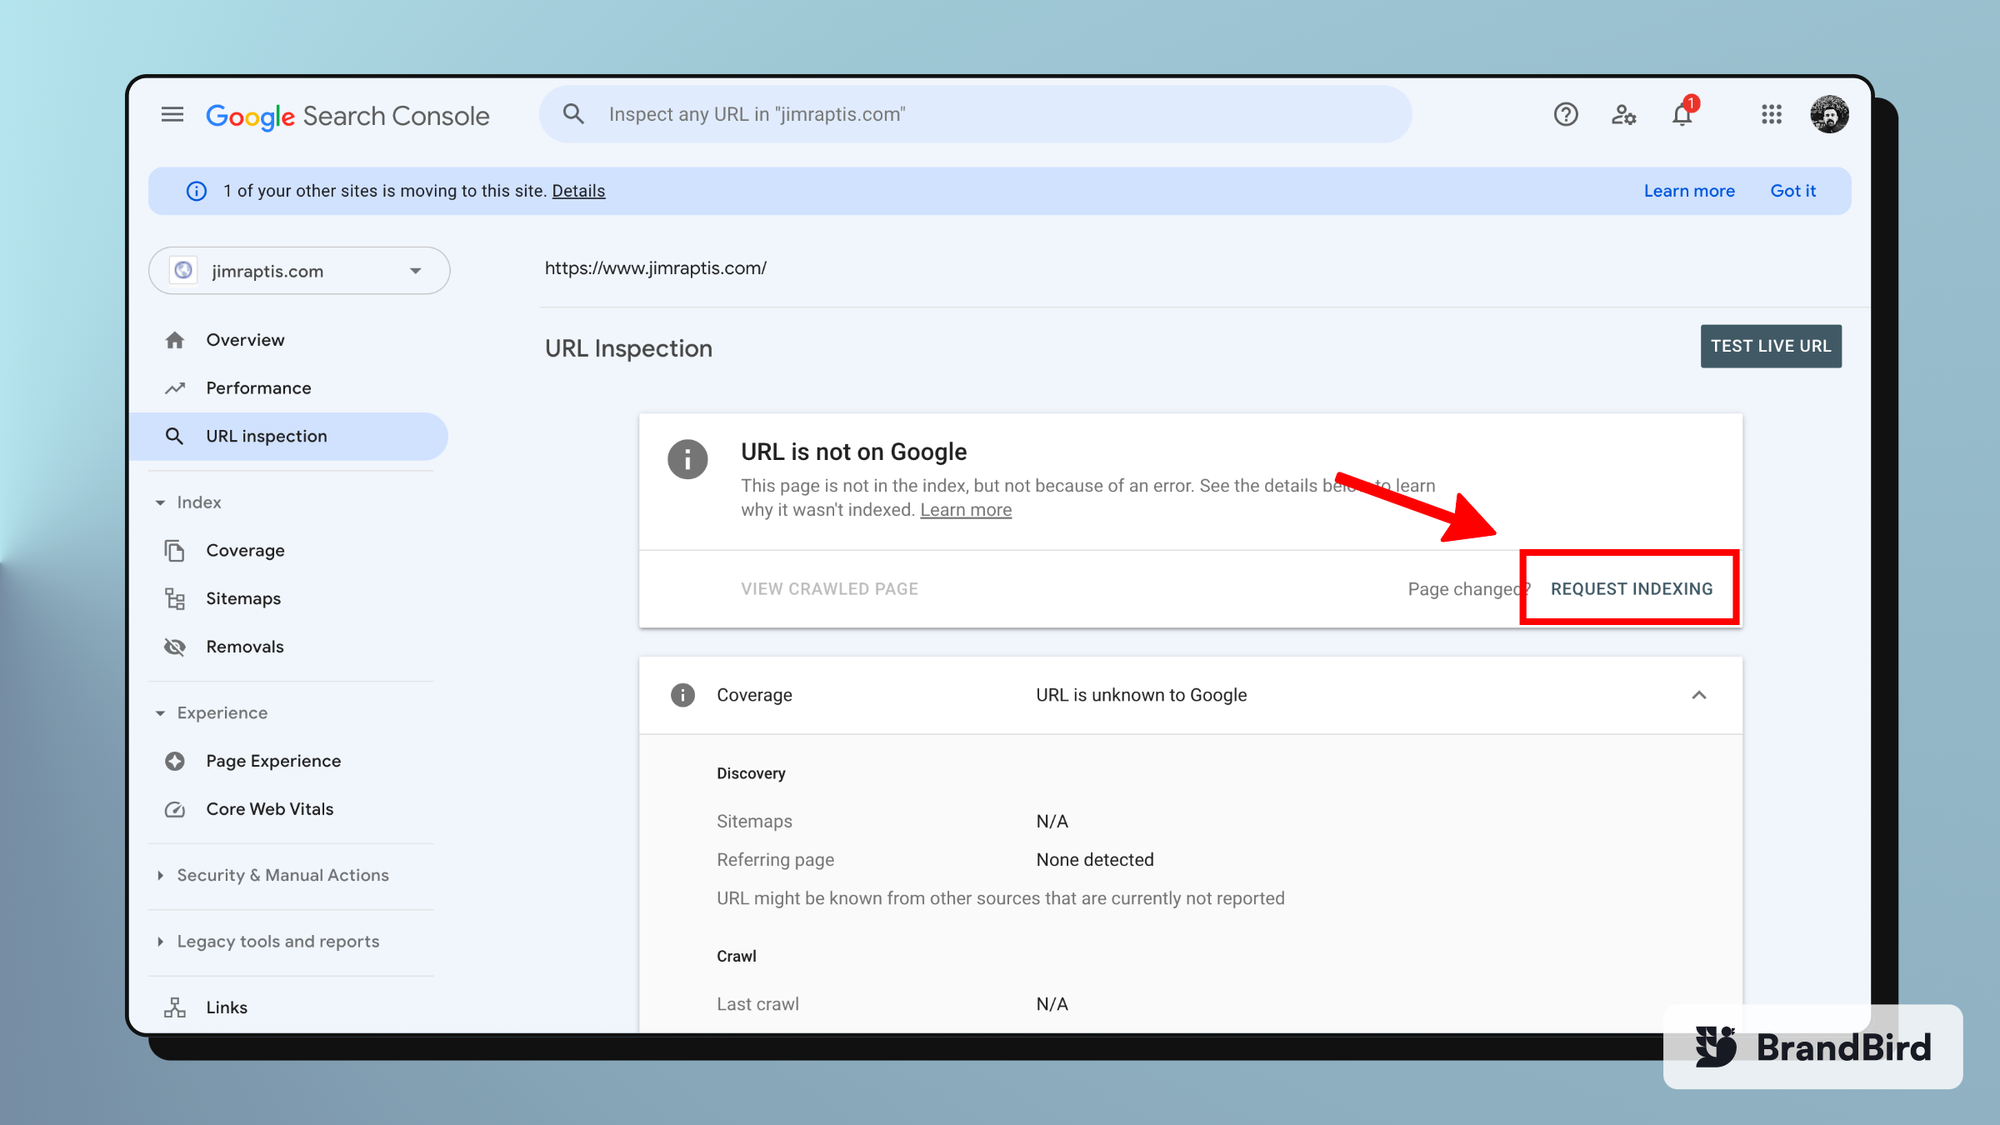
To speed up the indexing process you need to manually request indexing for your new domain. Prefer the root page and your most important blog posts.
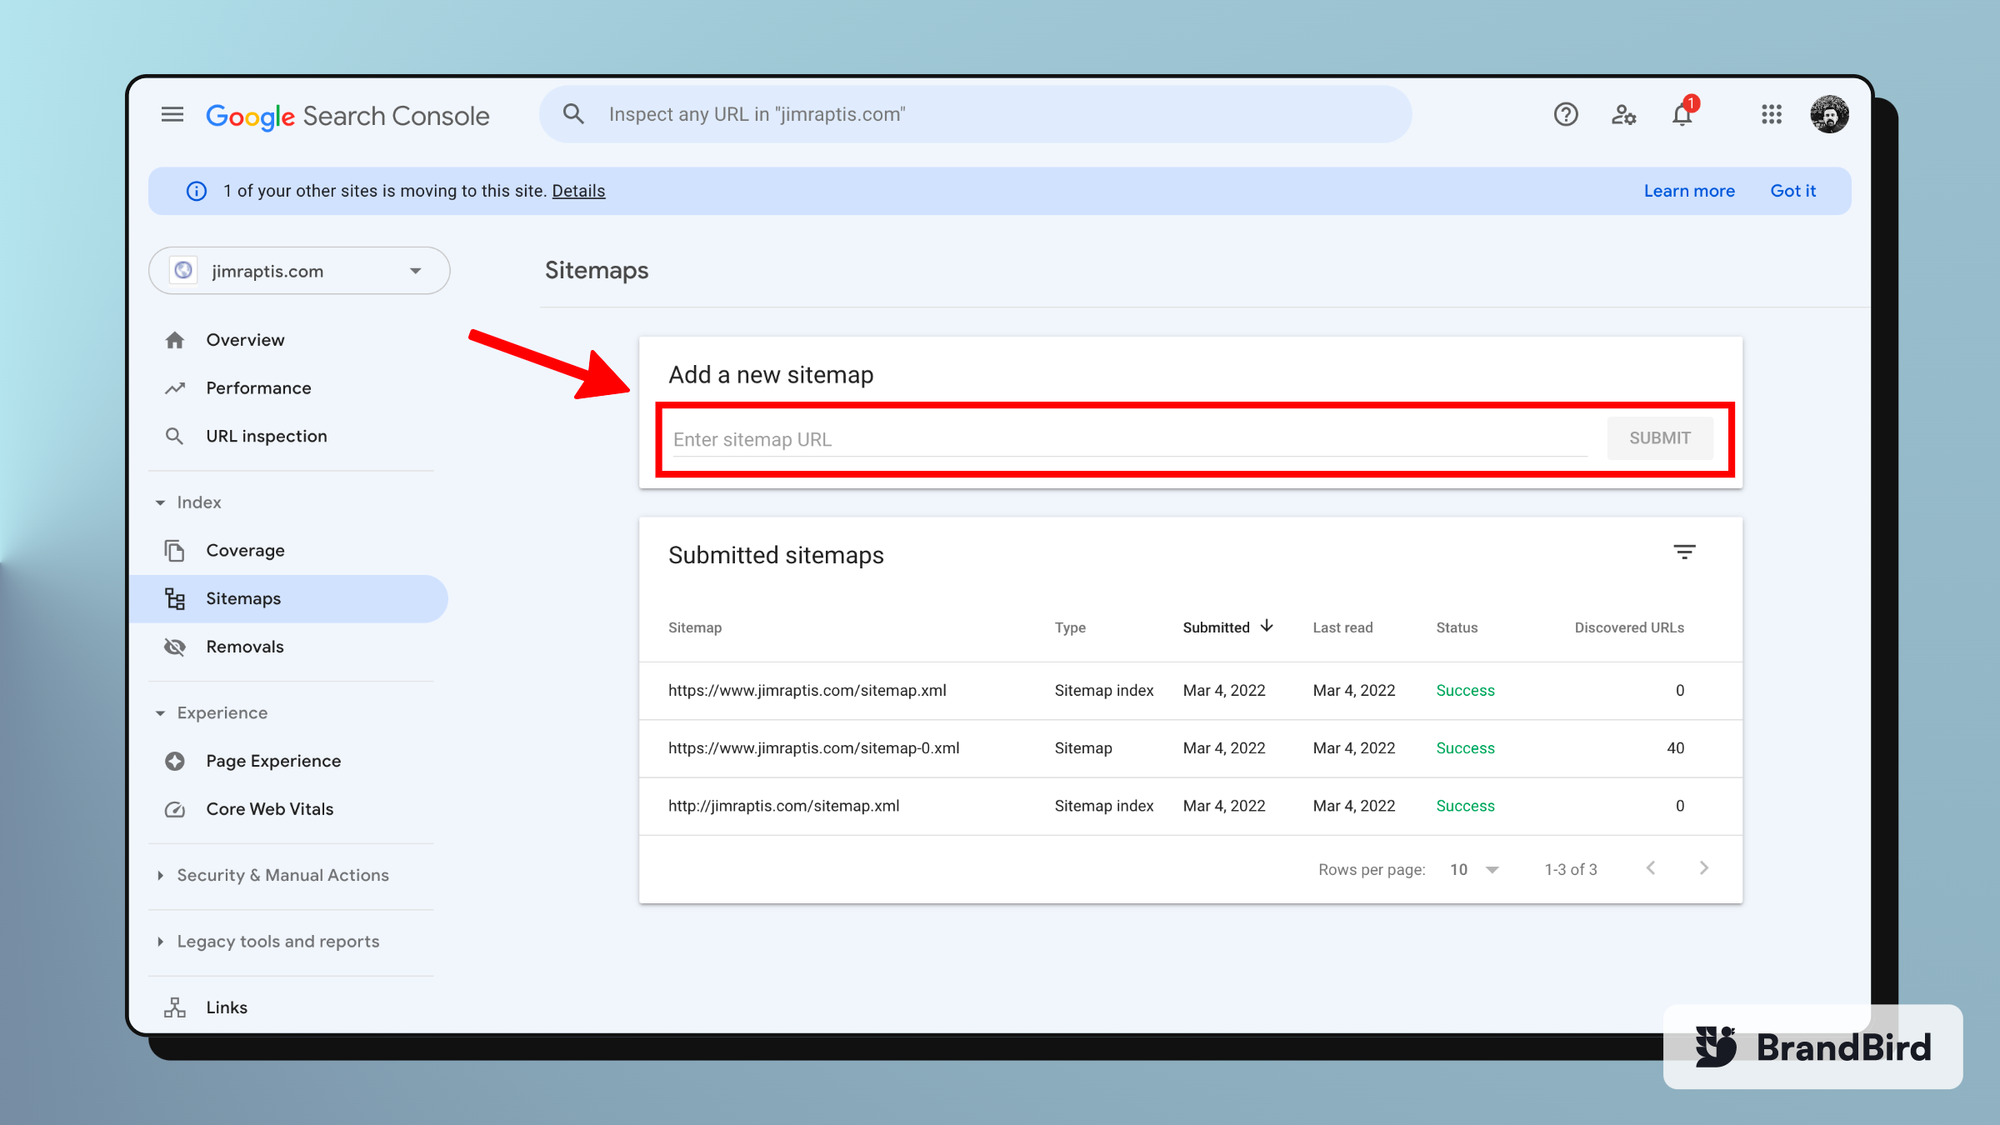
Then, you can submit your sitemap.xml file as well to help Google crawler understand your site structure better & discover your pages.
Next Steps
For the next couple of weeks, you need to monitor your traffic closely to identify any major traffic spikes. Google starts ranking the new content instead of the old one, so it’s common to see your old domain’s traffic decrease rapidly.
It takes up to 180 days for Google to fully complete the migration so be patient!
.jpg?table=block&id=0a35db91-23f1-4d18-985e-9ff2664ea564&cache=v2)
.png?table=block&id=917b538c-9f27-4cd0-858a-20ea2e80d9aa&cache=v2)
.webp?table=block&id=2442a2a4-3cc1-49ef-92a1-eb8fb9949d7b&cache=v2)