.jpg?table=block&id=dbe8205a-4e45-4d0e-b1b0-0e018759a61e&cache=v2)
When it comes to creating videos for new SaaS features, there are a few key tips to keep in mind in order to make the most of your video content to help generate buzz around your new features.
In this tutorial, I’ll teach you how to create engaging videos (like the one below) for feature announcements on social media & newsletter updates with minimal effort.
Pick the right tools
It’s crucial to pick the right tool for your video creation process.
Right now, my main video creation tool is Screen Studio, a great product from a fellow indie hacker.
Screen Studio has a few uniquely helpful features, like the zoom functionality. Zooming on specific parts of your UI to showcase new features is really easy & powerful.
Adam, the developer behind Screen Studio is responsive to feedback so you don’t have to worry about bugs.
What’s my video creation process
I use Screen Studio mostly for short social media videos, and feature announcements on newsletter updates. When I create a new video I follow 3 simple steps:
- Define the script
- Record the video (via the Screen Studio recorder)
- Edit on Screen Studio
Below, let’s analyze all the steps of the process!
1. Define the script
I usually go through the app and create a step-by-step process that showcases the new feature’s functionality clearly. You need to keep the user journey simple and avoid any irrelevant features.
Next, I review the user journey to confirm that it is good to go.
2. Record the video
It’s a simple step but you need to pay attention to a few things.
Never rush to complete the actions during the video recording.
Use steady mouse movements and don't hesitate to leave your cursor resting a bit longer on key elements that you want to showcase.
Make sure that your recording is 100% perfect before moving to the editing phase. Otherwise, you’ll have to start from scratch once you realize that the recording is missing crucial information.
3. Edit on Screen Studio
Editing is seamless with Screen Studio.
First, I pick a background for the video, usually a bright gradient, and crop the video recording (to remove unnecessary elements like the Chrome toolbar).
.png?table=block&id=b993be0d-7e2b-42d3-8482-a4a6d74ac92d&cache=v2)
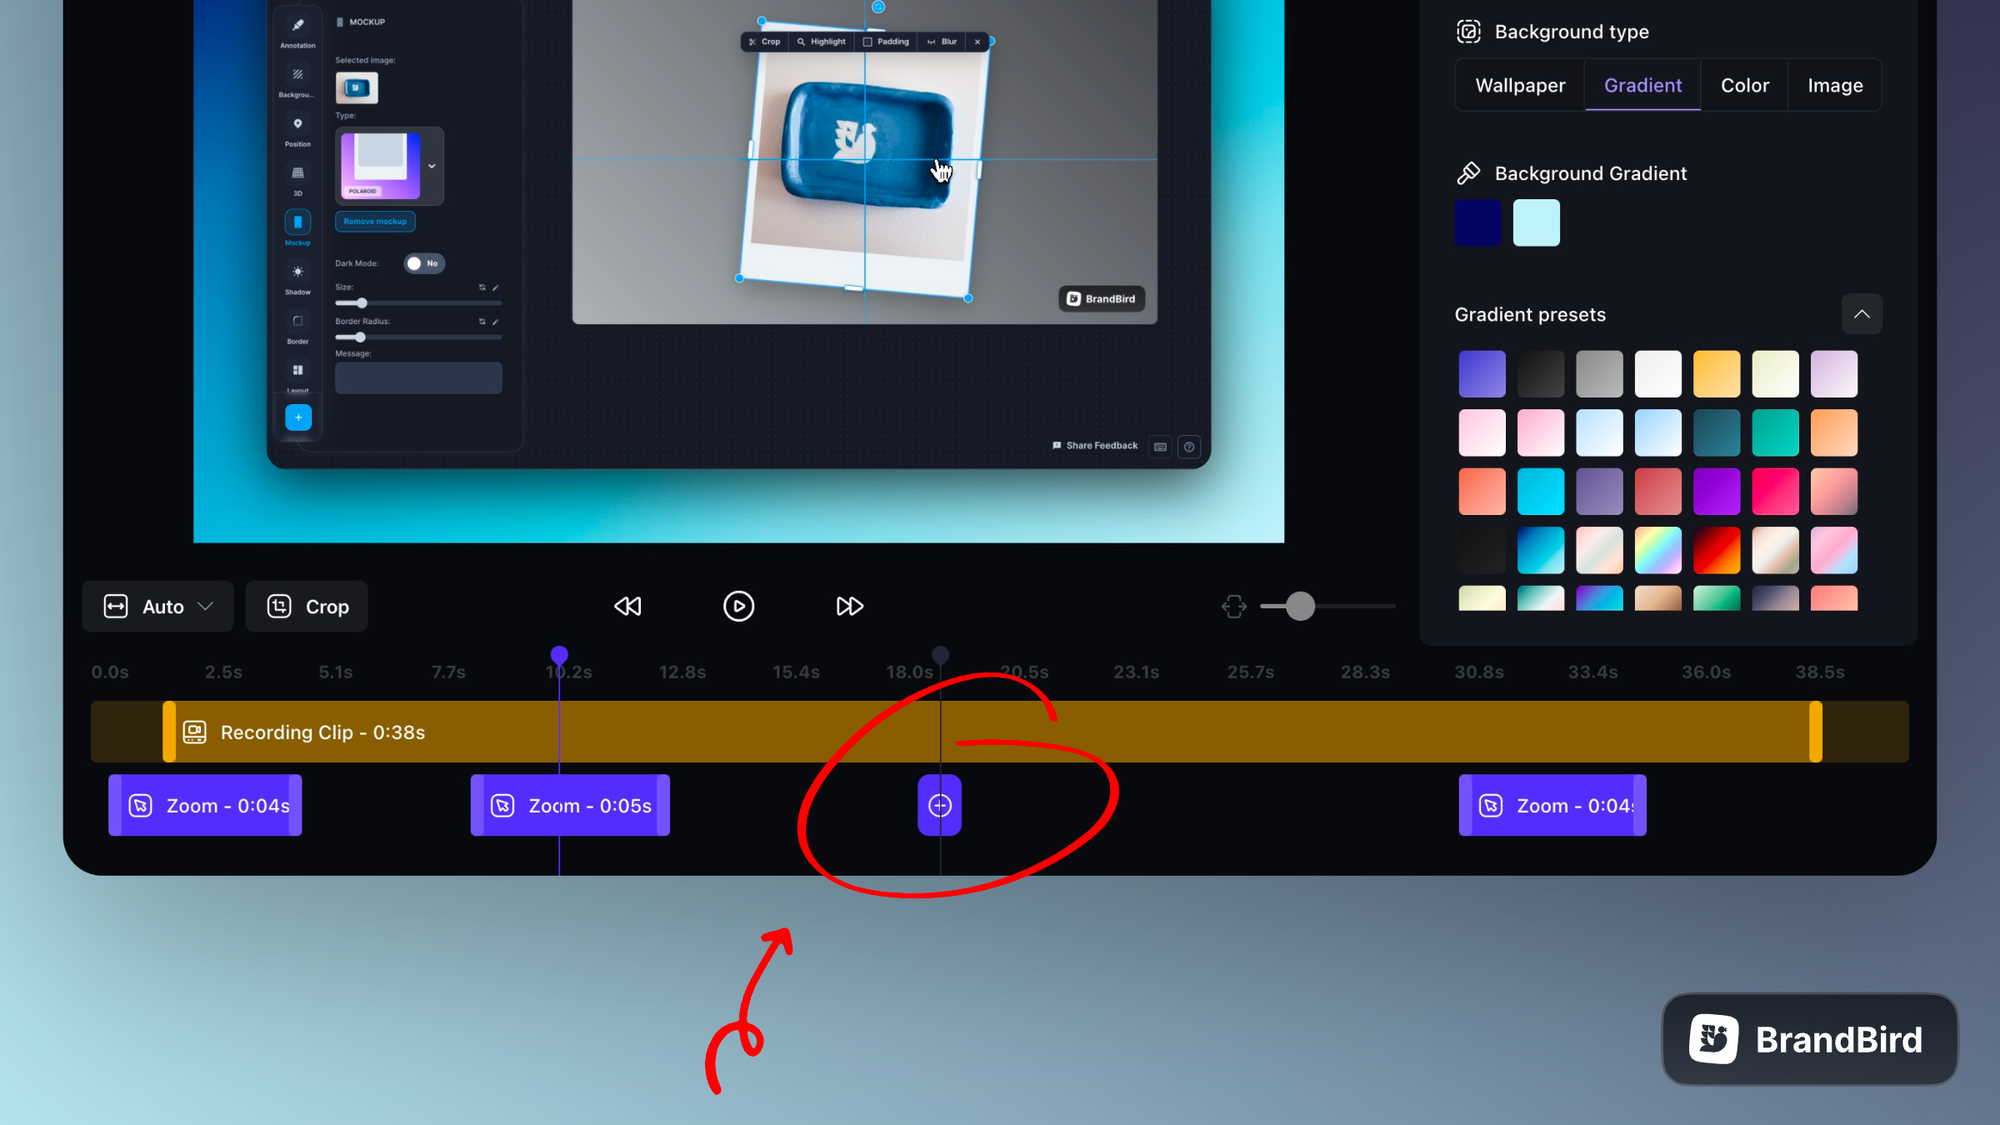
Then, it’s the “real” editing, which hopefully is dead simple with the Screen Studio’s zoom feature.
All you have to do is to define which video parts need to be zoomed in. Put your cursor at the bar below your recording clip and click to add a new “Zoom” point.
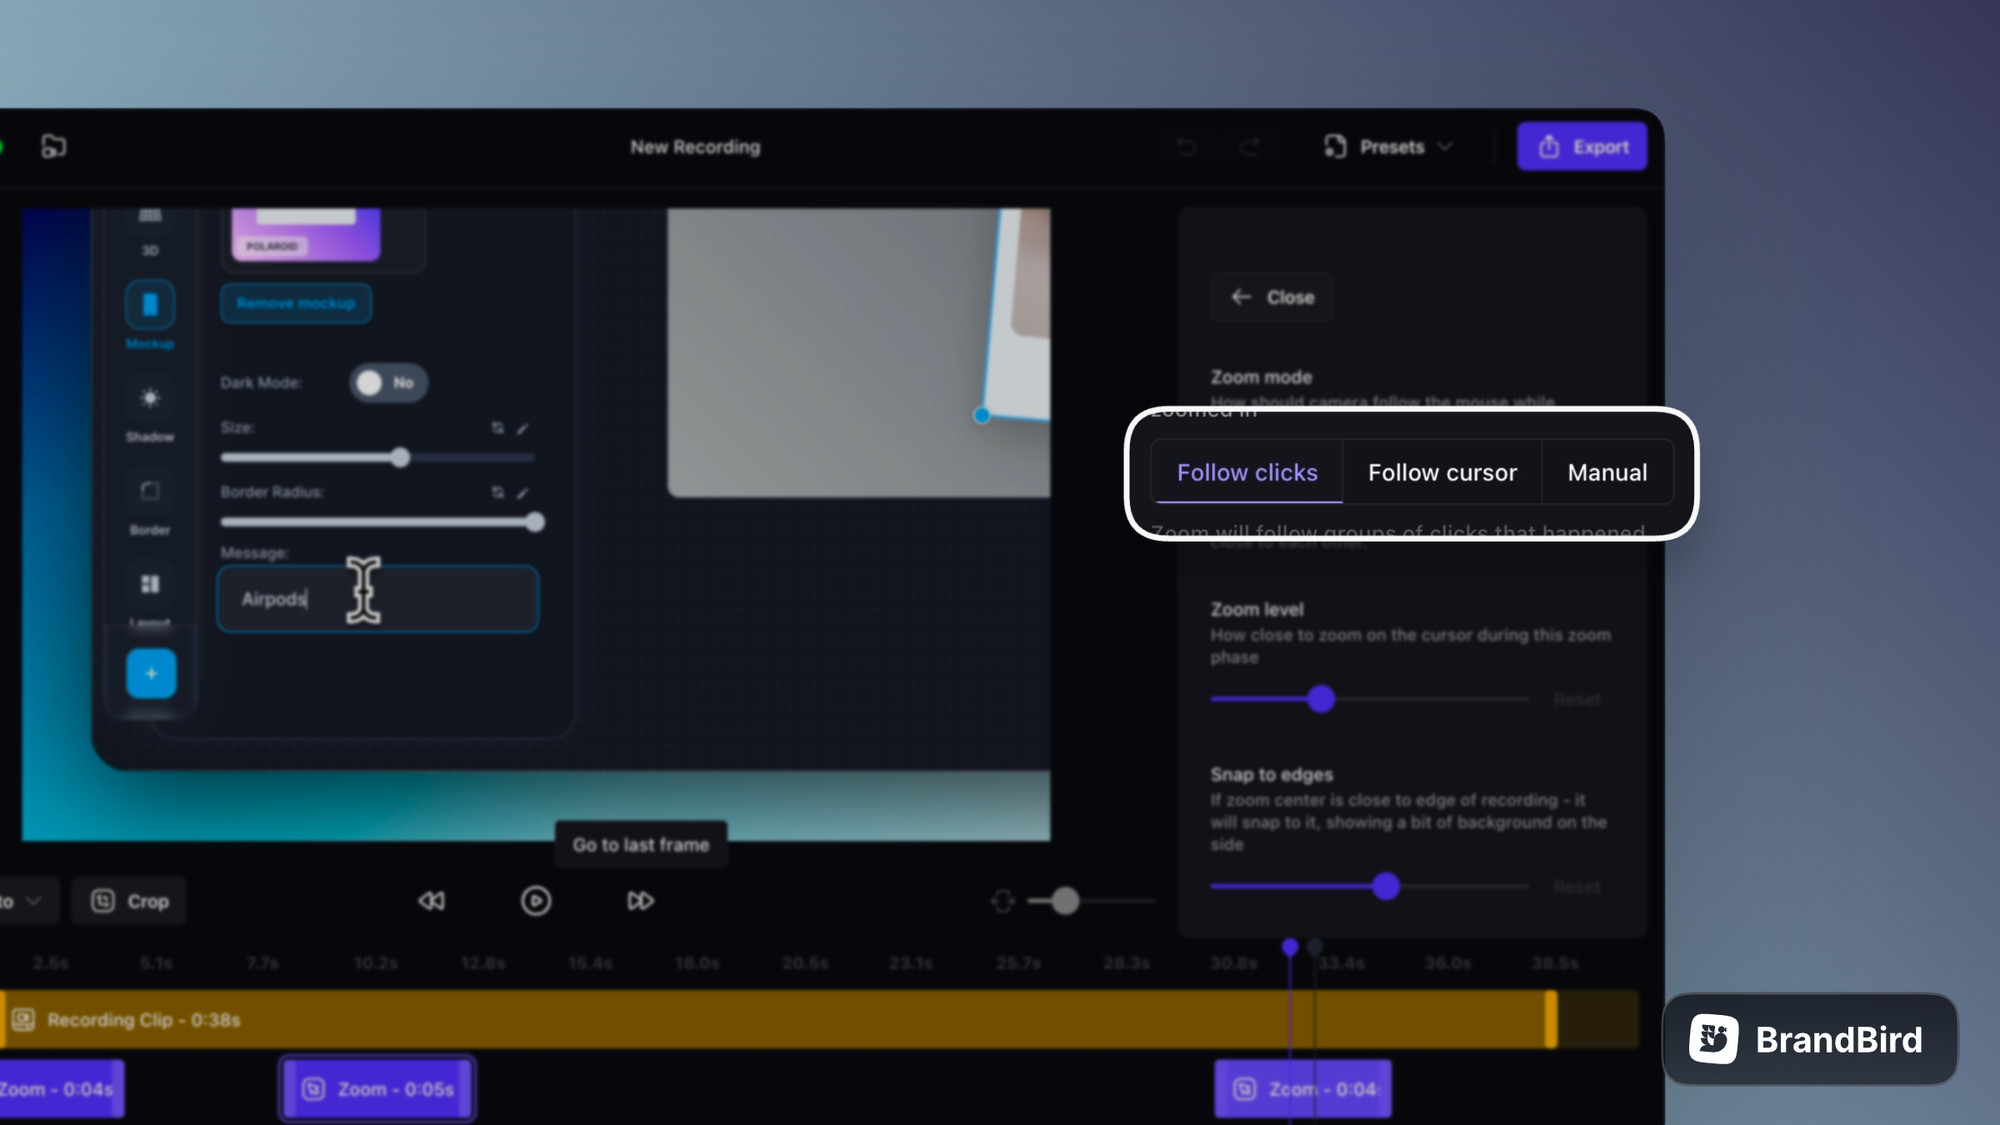
You can pick between 3 different zoom options:
- Follow clicks: the camera follows your cursor click and remains fixed between clicks
- Follow cursor: the camera follows your cursor movement with motion blur transitions
- Manual: select zoom area
Then, you can customize the zoom parameter and a few other options to make it look smoother and closer to your end goal.
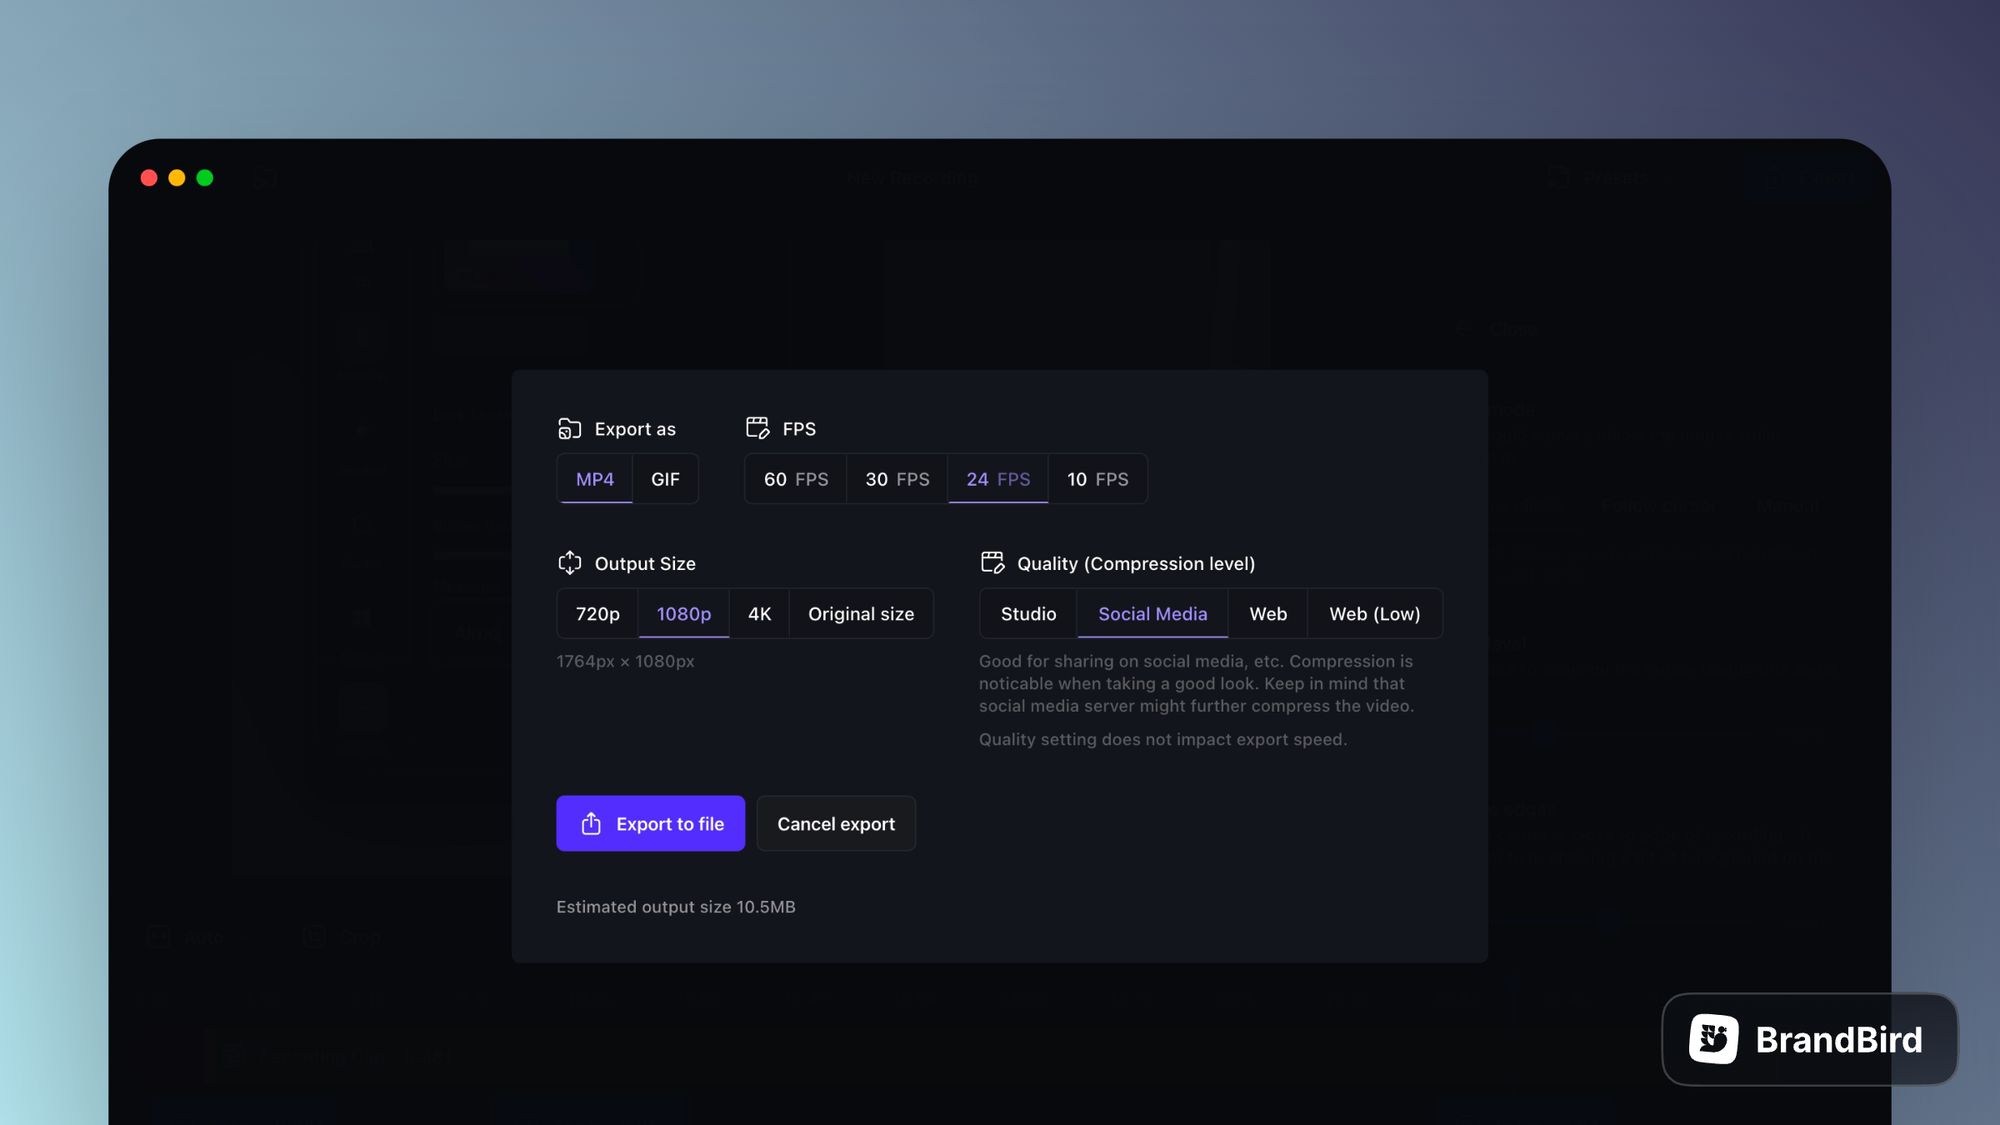
Exporting is the final step, and I’m really impressed with the export speed & quality. Usually, a 30sec video for Twitter takes ~1 minute to finish, the quality is decent, and its size is ~4-5 MB.
But you have many export options to choose from in case your needs differ.
In conclusion, that’s how I utilize Screen Studio to create engaging videos for my new SaaS features.
If you have any other questions, please don't hesitate to contact me.
.jpg?table=block&id=0a35db91-23f1-4d18-985e-9ff2664ea564&cache=v2)
.png?table=block&id=c293cfcf-058c-42e5-a7e1-56ab8ebb310f&cache=v2)
.png?table=block&id=917b538c-9f27-4cd0-858a-20ea2e80d9aa&cache=v2)